Adding a radio station and a rotary system
Radio stations and rotary systems are added in the Interfaces section.

Picture 1. Interfaces
To add a radio station, click on the Add new button.
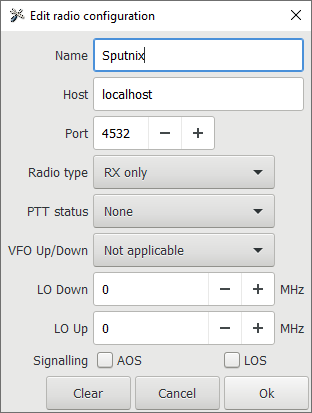
Picture 2. Add new
A radio station will be added.
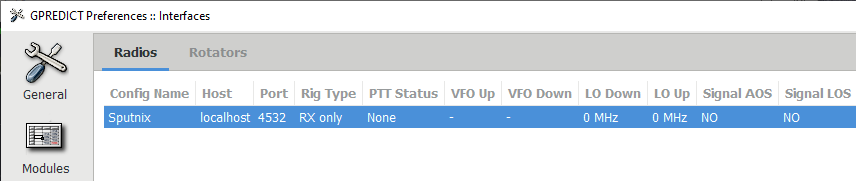
Picture 3. Added radio station
To add a rotary system, go to the Rotators section and click on the Add new button.
Please note! For the rotary system of the Zavitok complex, the standard value Max El 90° must be replaced by 180°.
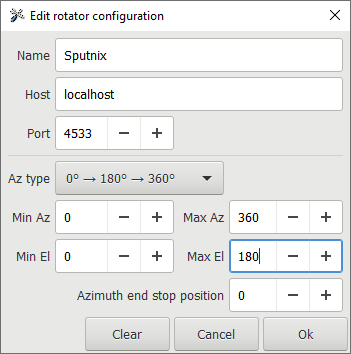
Picture 4. Rotary system settings
A rotary system will be added.
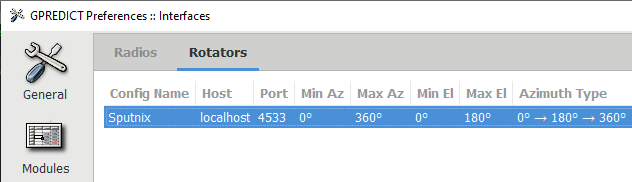
Picture 5. Added rotary system
After adding the radio station and the rotary system, the data should be updated.
Picture 6. Data update
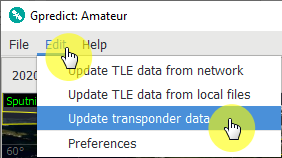
Adding satellites
To add satellites that will be monitored by Gpredict, select the Configure section in the right menu.
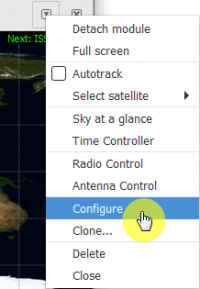
Picture 7. Configure
Then, in the filter window, you need to enter part of the satellite name to find the necessary devices, and click on the arrow to copy them to the right window.
![Satellite Search]
Picture 8. Satellite search
All added satellites will be displayed in the right window.
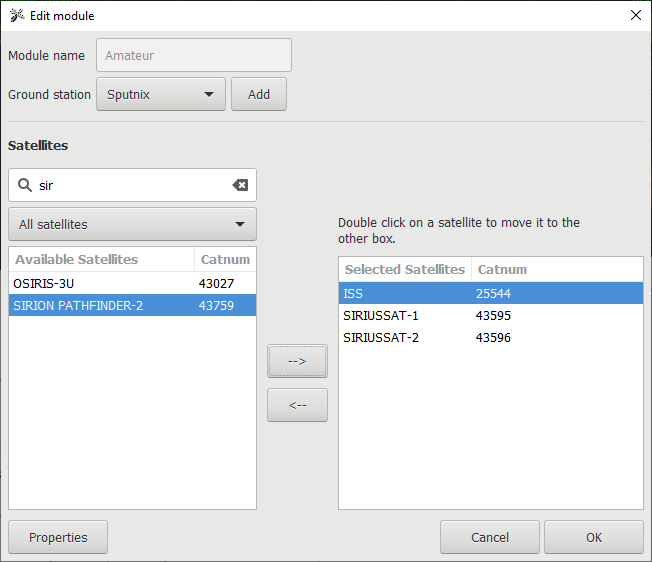
Picture 9. List of added satellites
Close the window, you will see new satellites on the map.
Picture 10. Satellites on the map
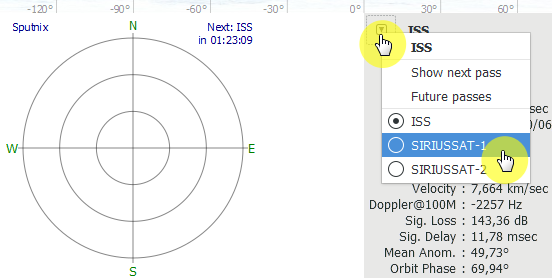
Using the drop-down list, you can select the satellite whose orbit parameters will be displayed.
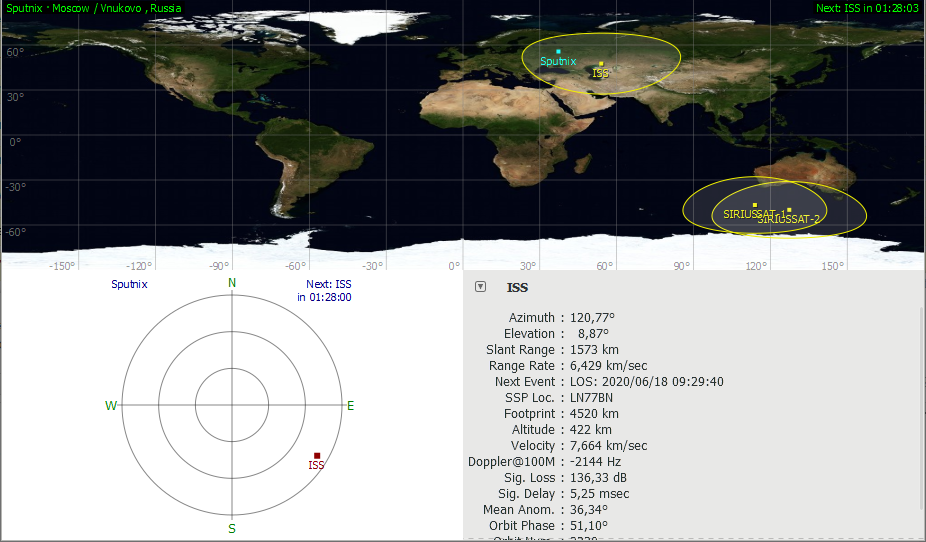
Picture 11. Orbit parameters of the selected satellite
When you right-click on the satellite image on the map, a menu appears that allows you to enable the display of the trajectory and visibility area of the device, as well as view:
- information about the satellite;
- parameters of the next flight;
- a list of the nearest flights.
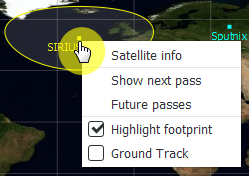
Picture 12. The menu of the selected satellite
The satellite information window contains the following information:
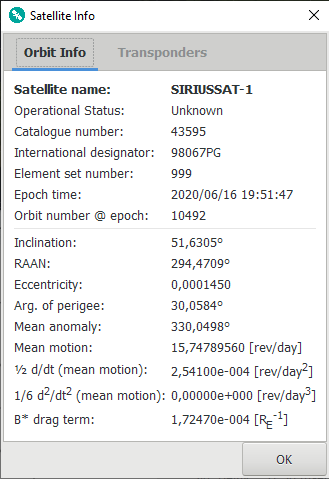
Picture 13. A window with information about the selected satellite
- Satellite name - the name of the satellite;
- Operational Status - current status;
- Catalog number - the number in the NORAD catalog;
- International designator - NSSDC catalog number (COSPAR);
- Element set number - TLE number;
- Epoch time - the time of the TLE epoch;
- Orbit number @ epoch: - the number of the orbit in the epoch;
- Inclination - inclination;
- RAAN - the right ascent of the ascending node;
- Eccentricity - eccentricity;
- Arg. of perigee - the perigee argument;
- Mean anomaly - the average anomaly;
- Mean motion - orbits per day.
Information about the next flight can be presented in three ways:
In the form of a table indicating the time, azimuth, altitude above the horizon and distance to the satellite;
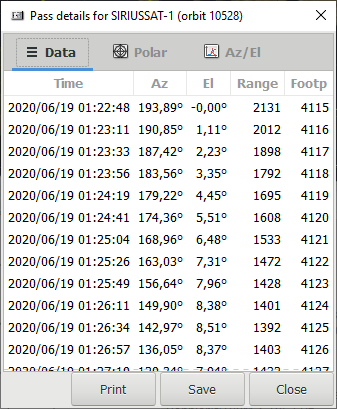
Picture 14. Information about the next flight in the form of a table
In radar form, indicating the time and trajectory of the flight;
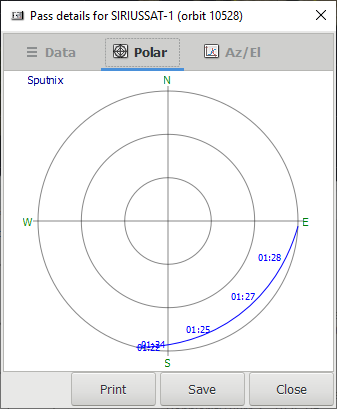
Picture 15. Information about the next flight in radar form
In the form of a graph indicating the time, azimuth and altitude above the horizon.
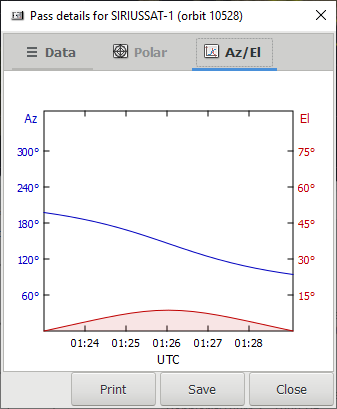
Picture 16. Information about the next flight in the form of a graph
The list of the nearest flights is presented in the form of a table indicating the time of appearance and disappearance of the signal, the duration of the flight, the maximum rise above the horizon, and the azimuths of the points of appearance and disappearance of the signal.
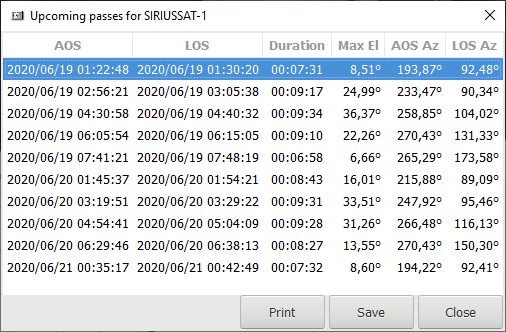
Picture 17. List of nearest flights
When you hover the cursor over the satellite for a few seconds, a window appears with the following information:
- Lon - Longitude;
- Lat - Latitude;
- Az - Azimuth;
- El - Height above the horizon;
- AOS - Time to the nearest event in minutes.
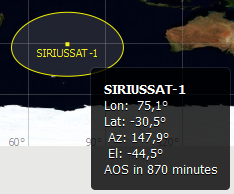
Picture 18. Satellite Information
Time management
You can control the time in the Time controller section of the right menu.
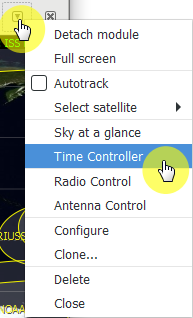
Picture 19. The Time controller section in the right menu
By default, Gpredict works in real time, but it is possible to switch to simulation mode and set any date and time. The Reset button allows you to return to the true time.
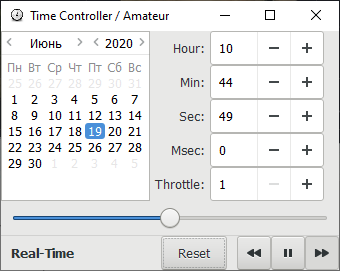
Picture 20. Time controller
Review mode
In the Sky at a Glance section of the right menu, you can turn on the overview mode, which allows you to take a look at all the satellite flights that will occur in the next 8 hours.
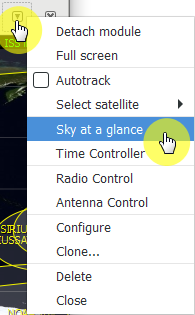
Picture 21. The Sky at a Glance section in the right menu
All upcoming flights will be shown in one window.

Picture 22. Sky at a Glance