Configuring the Gpredict interface
You can change the appearance and location of windows in the right drop-down menu by selecting Configure (Picture 1):
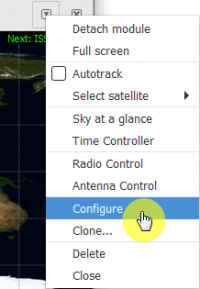
Picture 1. Configuring the interface
There is a settings button at the bottom Properties (Picture 2):
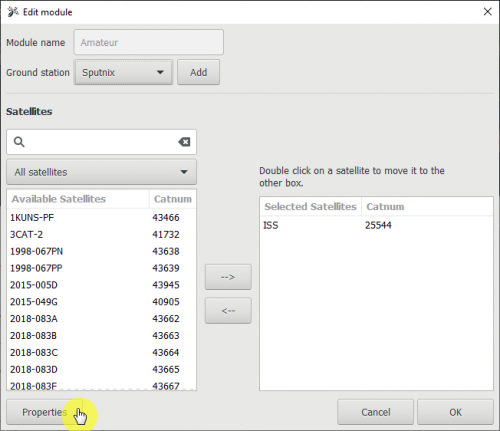
Picture 2. Settings button
By default, the map, radar and a window with the parameters of the orbit of one satellite are enabled (Picture 3):
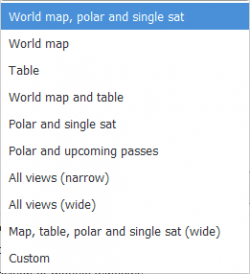
Picture 3. Default settings
The following appearance settings are available:
- Map, radar, orbit parameters;
- Card only;
- table only;
- Radar and orbit parameters;
- Radar and nearby overflights;
- all in one window under the map;
- all in one window to the right of the map;
- Map, radar, table and orbit parameters;
- User mode.
It is possible to return to the initial state of the settings of each section using the Reset button, which is present in each section (Picture 4):

Picture 4. Reset button
On the Refresh Rates tab, you can adjust the frequency of information updates (Picture 5). By default, the information is updated with a period of 300 milliseconds. The map and radar are updated less frequently than the table and the orbit parameters. The map is updated every 10 cycles, and the radar is updated every 3 cycles.

Picture 5. Frequency of information updates
On the List View tab, you can configure the fields of the table (Picture 6):
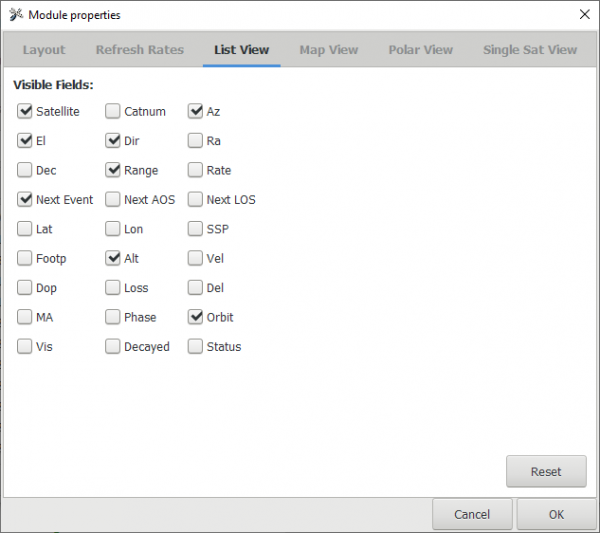
Picture 6. List View tab
The appearance of the map and the colors can be customized on the Map View tab (Picture 7):
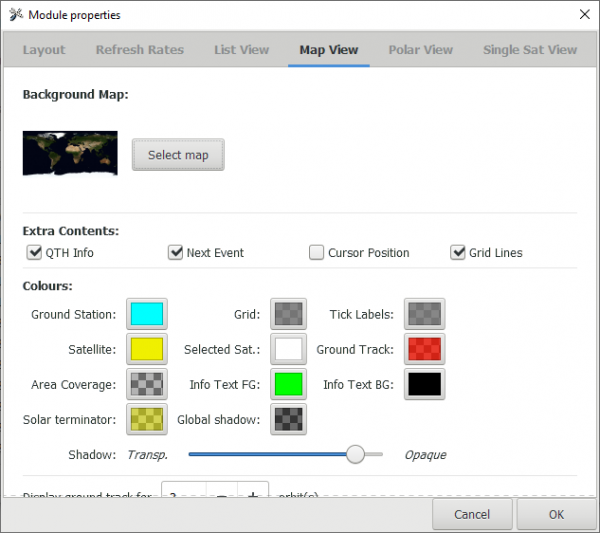
Picture 7. Map appearance and colors
Radar settings and colors are changed on the Polar View tab (Picture 8):
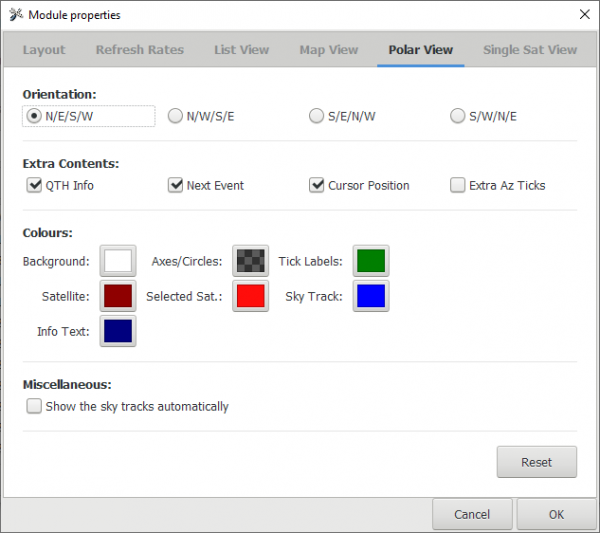
Picture 8. Radar and color settings
The list of satellite orbit parameters is configured on the Single Sat View tab (Picture 9):
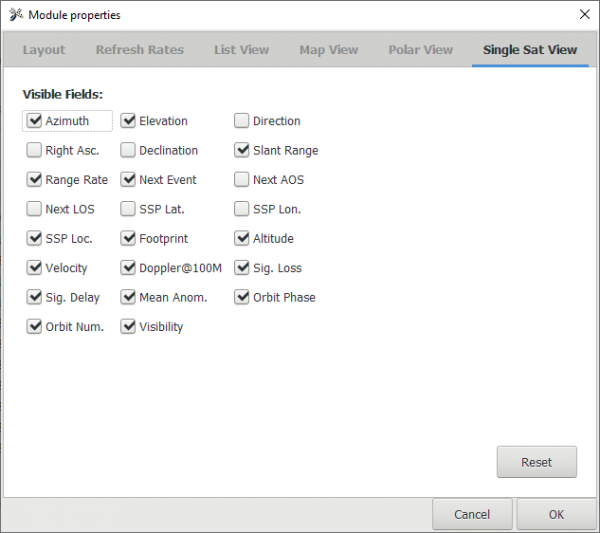
Picture 9. List of satellite orbit parameters
The parameter lists for each of the windows are given in the following tables (Picture 10):
-5eff936d998f5b11e237081493de027f.png)
-ed9e314cd7282c70fa00fa9bd72fdbde.png)
Picture 10. A table with lists of parameters