Using the ERS camera
Taking a picture from the camera requires working with the FCC program from the [Required software] section(/docs/orbicraft/instruction_for_working_with_orbicraft/required_software) and performing some sequence of actions described below.
Screenshots and the described path in the instructions are provided for Windows 7. In Windows 8 and 10, the names of the tabs may differ.
Connecting the Camera
Connect the camera using a special papa-papa cable to the BKU.
- You can read about how to assemble the loop here.
Connecting the HF transmitter
- Connect the HF transmitter to the OrbiCraft constructor network
When the HF channel is running on the constructor, the LED of the HF transmitter emits a light signal, and the sensor on the HF receiver picks it up.
The real HF channel on spacecraft does not use light signals, but operates on the basis of high-frequency radio communication. In the OrbiCraft designer, images are transmitted using HF receiver and HF transmitter simulators, but in fact the image is transmitted over a Wi-Fi channel between the BKU and the FTP server, which is deployed automatically on a personal computer when FCC (Ground) is launched Control.exe ). This approach allows you to demonstrate a certain "visibility" of the processes.
The HF receiver can be connected to the user's computer using a USB adapter included in the kit of the designer. HF receivers built into the globe can be used while working with the globe.
It is mandatory to have an HF transmitter in the designer's network to transmit the snapshot. It is not necessary to use an HF receiver to receive a snapshot, since the snapshot must be transmitted and appear in the FCC window without it. In the event that the transmission of the image occurred in the presence of an HF receiver and the HF transmitter LED was flashing in the field of view of its sensor, a message will be displayed under the photo stating that the transmission of the image occurred via the HF channel.
Setting a static IP address
Log in to Control Panel → Network and Internet→ Network and Sharing Center (Picture 1):

Picture 1. Network and Sharing Management Center
Press Wireless Network Connection (Picture 2):
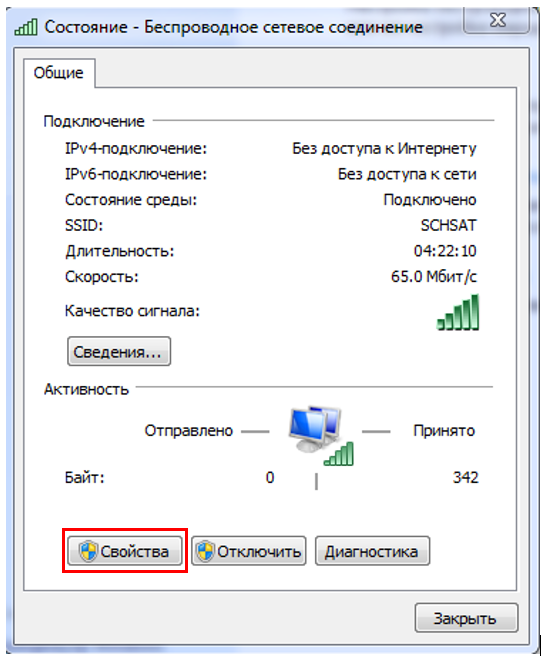
Picture 2. The "Wireless Connection" window
Click Properties (Picture 3):
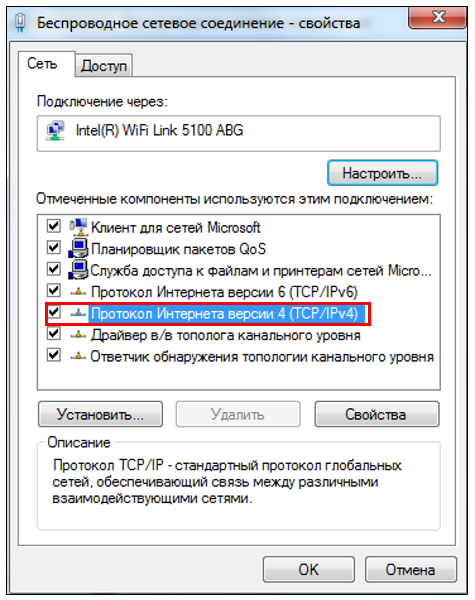
Picture 3. Properties
Click Internet Protocol version 4 (TCP/IPv4) (Picture 4):
Picture 4. Internet Protocol version 4
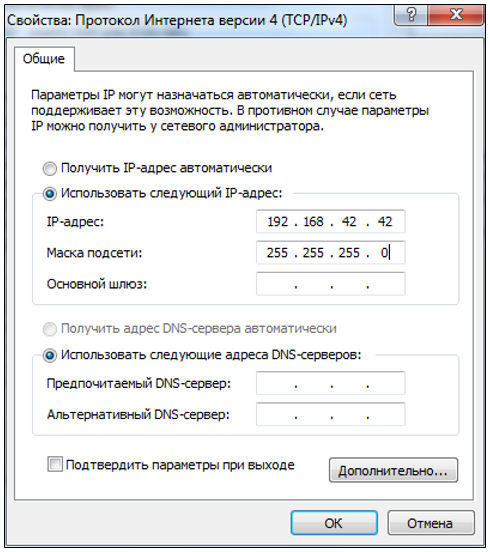
In the window that opens, check the box next to Use the following IP address:
Register the IP address 192.168.42.42
Click on the empty columns of the Subnet Mask item, the address will automatically appear in them 255.255.255.0 .
Click OK.
After completing the work with the constructor, you need to change the settings back to "Get an IP address automatically". Otherwise, the standard Wi-Fi connection will not work.
Disabling Windows Firewall
Windows Firewall may block the transfer of snapshots over the Wi-Fi channel, so it must be disabled.
- Click Control Panel → Windows Firewall (Picture 5):
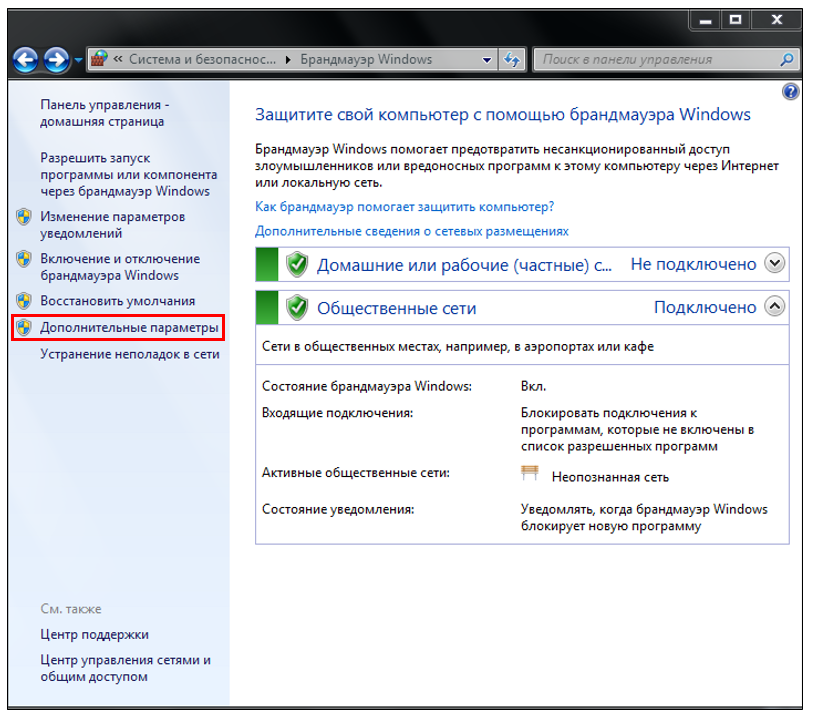
Picture 5. Windows Firewall
Click Advanced Options (Picture 6):
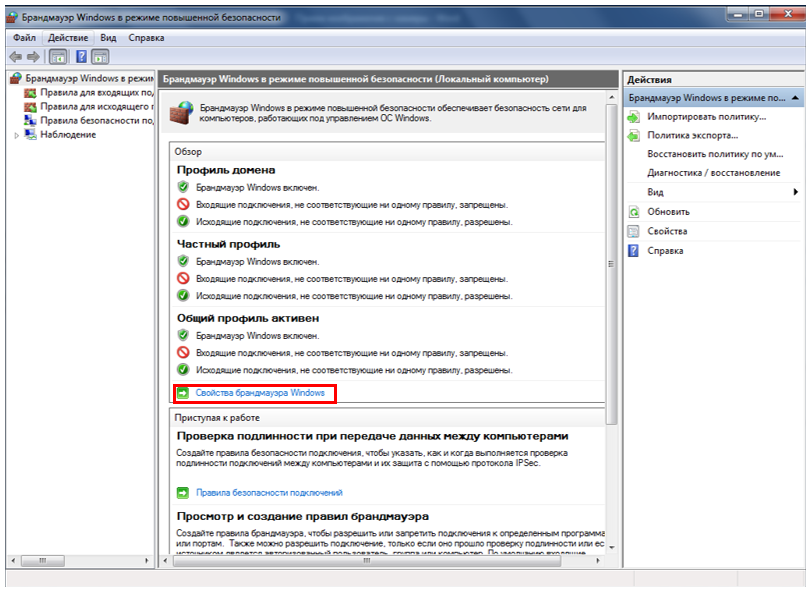
Picture 6. Additional parameters
Click Windows Firewall Properties (Picture 7):
Picture 7. Windows Firewall Properties
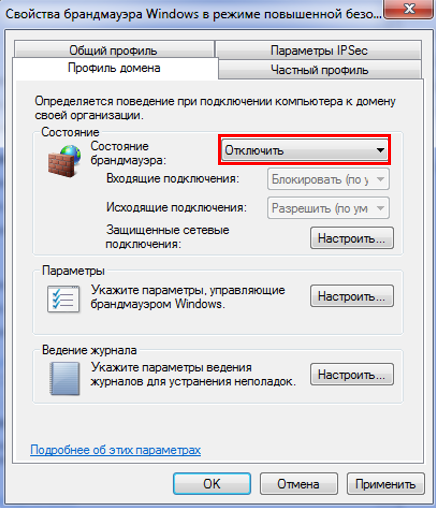
- A window will open containing 4 tabs. In the drop-down list of the Domain Profile tab, in the Firewall Status field, change the Enable state to Disable, repeat the same in the Private Profile and General Profile tabs.
You can restore computer protection after you finish working with the designer by returning to the Windows Firewall window and clicking the Restore Recommended Settings button.
FCC Launch
- Launch the FCC
On how to run the FCC (Ground Control.exe ) can be read here.
When the FCC starts, the FTP server automatically starts in the background. In fact, it is he who takes the picture from the camera. Only one FTP server must be running at a time to receive the snapshot correctly.
If you have previously launched the FCC (Ground Control.exe ), then make sure that only one process is running in the task manager ftpdmin. Press simultaneously on the keyboard Ctrl+Alt+Delete → Task Manager → Processes tab.
Figure 8 shows an example when several such processes are running. This is wrong and you need to disable all processes ftpdmin (by selecting the process and clicking the Remove task button), and then restart the FCC.
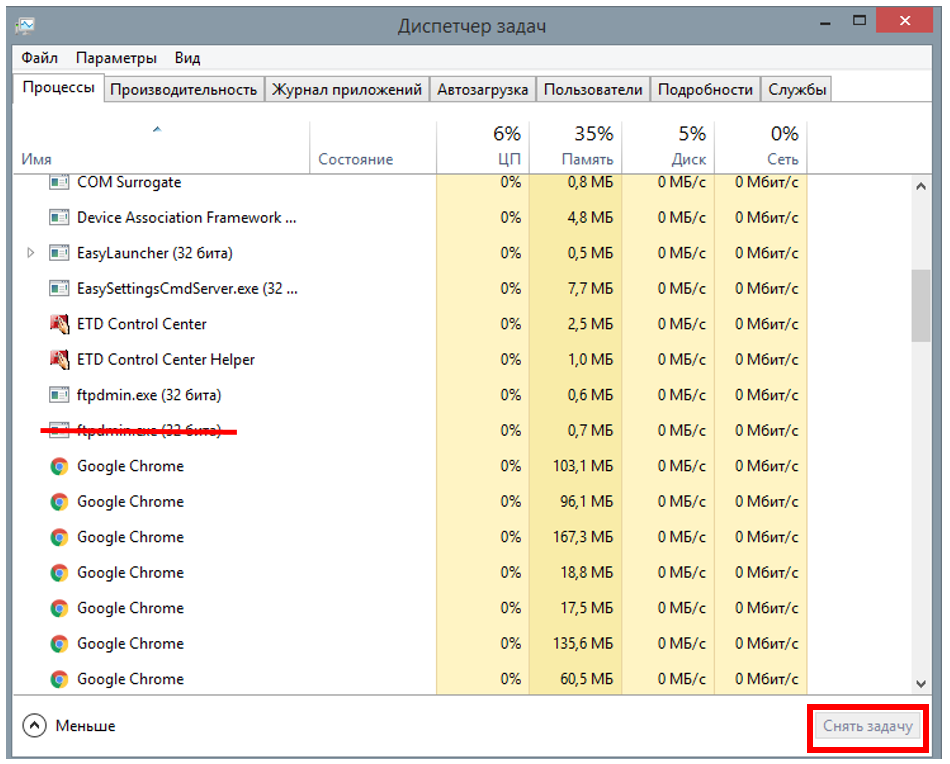
Picture 8. Running Windows processes
Launching the program
- Run the program to capture and transfer the image
You can read about how to create and run the program in the [First introduction] section (/docs/orbicraft/lessons/first_program).
The test program, which is presented in the [ERS Camera] section(/docs/orbicraft/subsystems/camera), will take ten pictures in a row and transfer them to the user's computer. At the same time, in the FCC program (Ground Control.exe ), running on the user's computer, the received data will be displayed in the area to the right of the map in place of the SPUTNIX logo.
The received photos are located in the FTP folder, which is created automatically in the Ground_Control folder, from which the Ground program is launched Control.exe . The files can be located in the folders caught and missed, depending on whether the signal hits the HF transmitter: if the signal hits, the data is recorded in the folder caught (received), in case of a weak signal or its absence, the files are considered lost and recorded in the folder missed (missed).
Test the camera by clicking on the Camera Test button in the OrbiCraft Web interface (Picture 9):
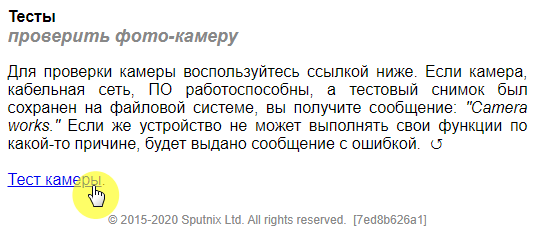
Picture 9. Camera test
If the camera can work with the camera, the message Camera works (Picture 10) will appear:

Picture 10. A message about the correct operation of the camera
If the BKU cannot work with the camera, the message Connection error#1 (Picture 11) will appear:

Picture 11. A message about incorrect camera operation
In this case, you need to restart OrbiCraft (turn off the power and turn it on after 10 seconds).