Creating and uploading schedules (Schedule)
The spacecraft has the ability to upload schedules to perform specified actions at specific time periods (for example, to orient and stabilize the spacecraft at a certain point for taking photos). The sequence of actions for uploading the schedule on board the spacecraft:
Turn on OrbiX and connect the ground VHF via USB.
Launch Houston Server and Houston App
Open Settings Houston App (File → Parameters) (Picture 1):
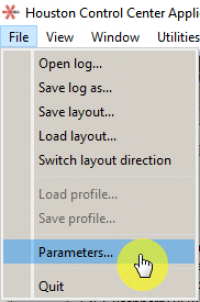
Picture 1. Houston App Settings
In the 14th line of settings, set BoardAddrress to 0x2 (Picture 2):

Picture 2. Device address
Using the command 2-421A request_Time, make sure that the current UTC time is set on the onboard VHF (Picture 3):
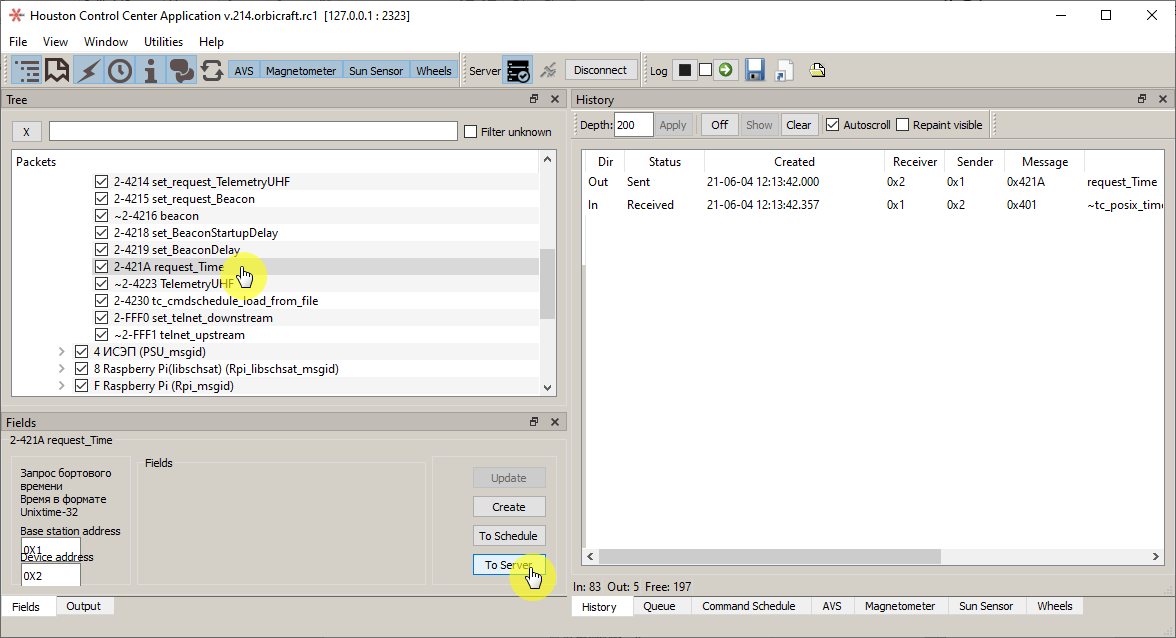
Picture 3. Time request on the on-board VHF
To view the on-board time, select the line with the answer 0x401 ~tc_posix_time. You will see the on-board time in the Fields panel (Picture 4):
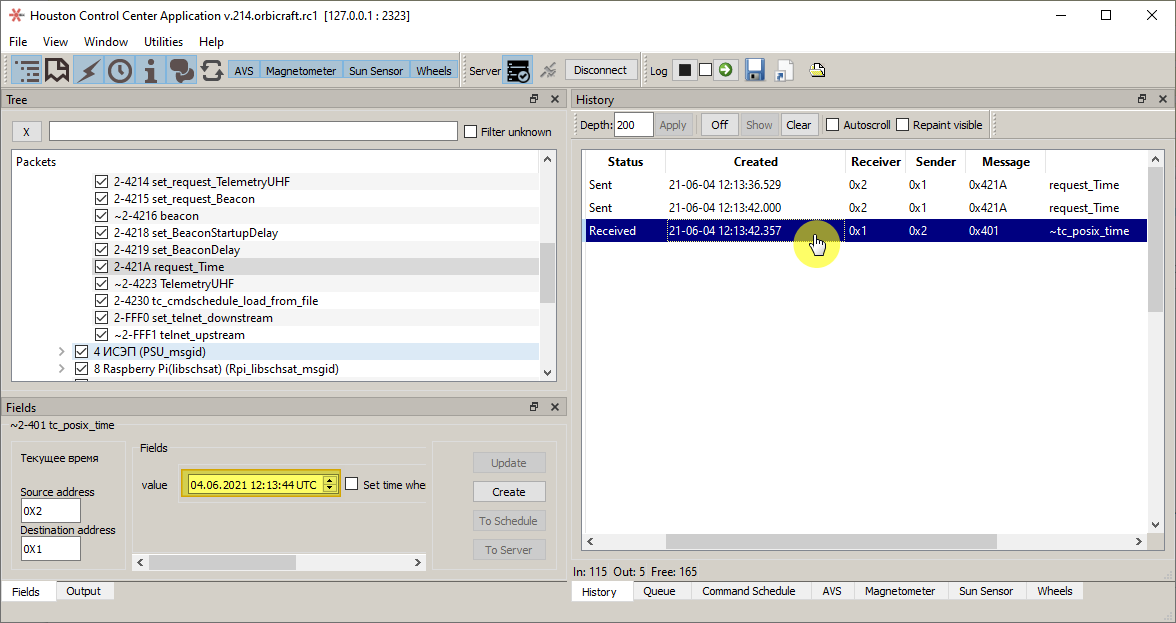
Picture 4. View on-board time
If the time on the on–board VHF differs significantly from the current time, it must be set with the command 2-4213 set_Time, by checking the Set time when sending (Picture 5):
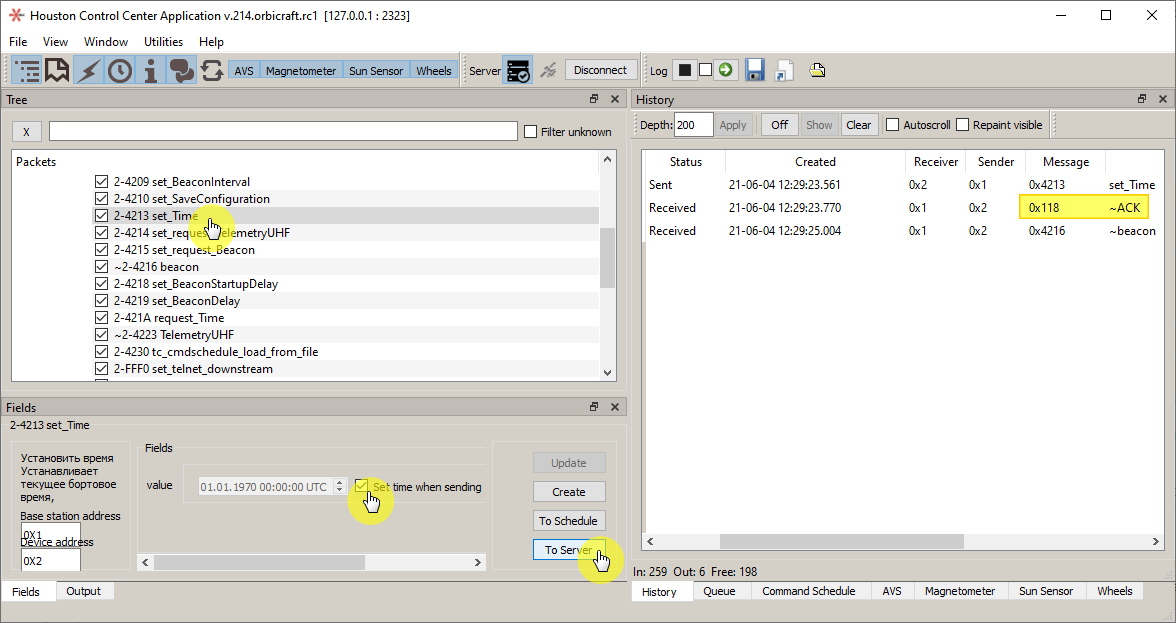
Picture 5. Setting the correct time
In the Houston App create a schedule Schedule with selected teams (Picture 6):
Attention! The execution time of the first command must be set, with the check box Calendar time (the time is specified in UTC).
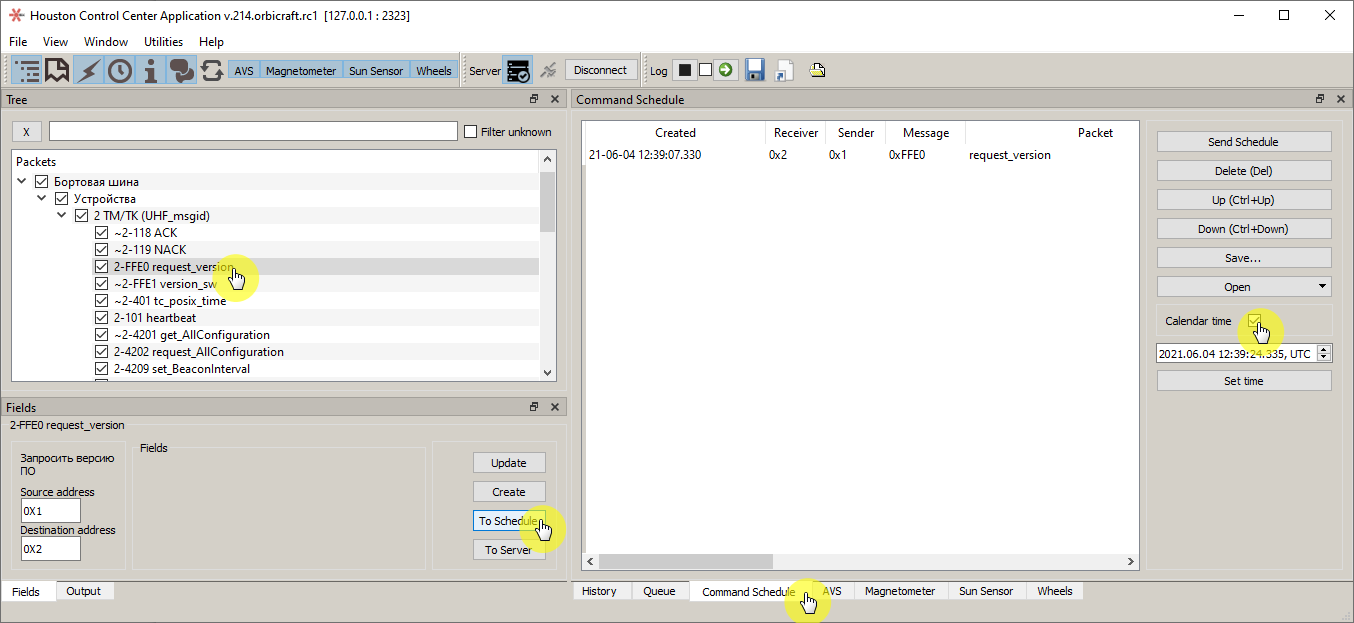
Picture 6. Schedule with selected teams
Save the schedule in the format.bin by clicking Save... (Picture 7):
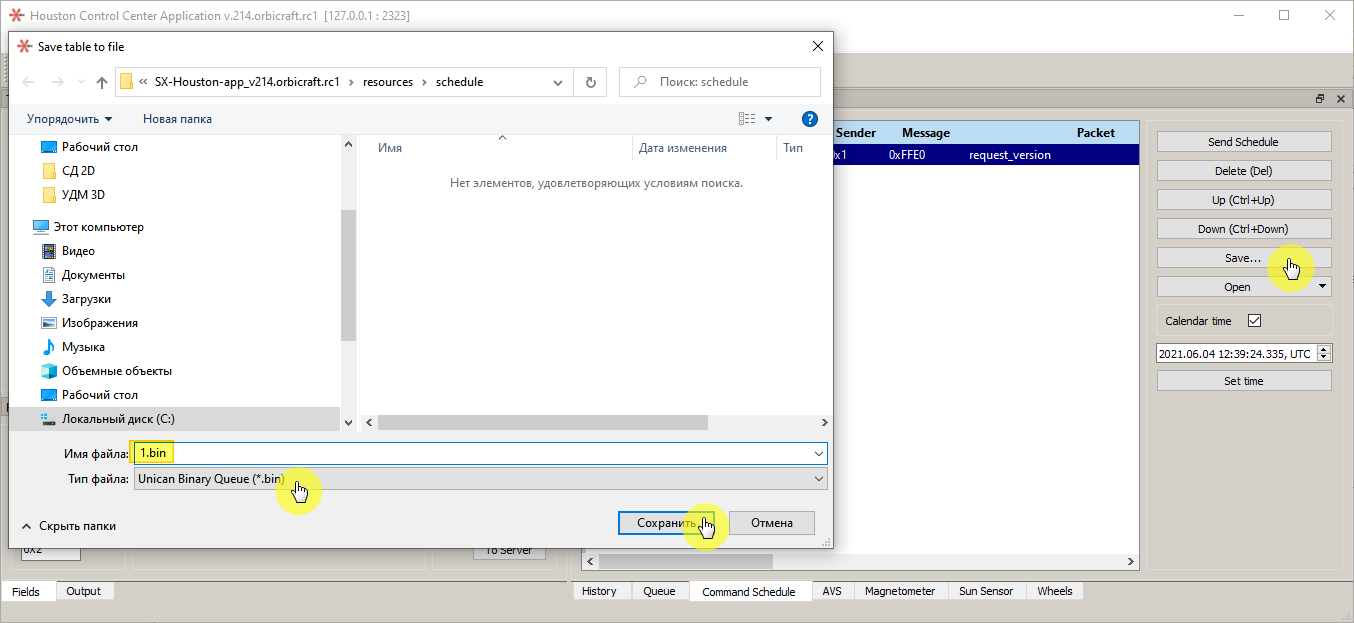
Picture 7. Saving the schedule
Launch the Houston Telnet Client and make sure that the status bar of the main window displays the status of Server: connected (Picture 8):
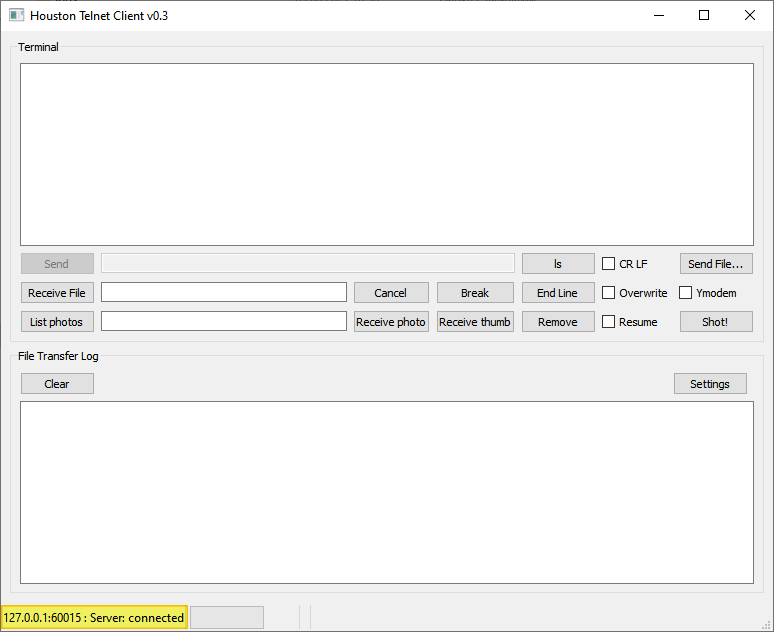
Picture 8. Status bar in Houston Telnet Client
Open the settings Houston Telnet Client and install Telnet port → 60002 (Picture 9):
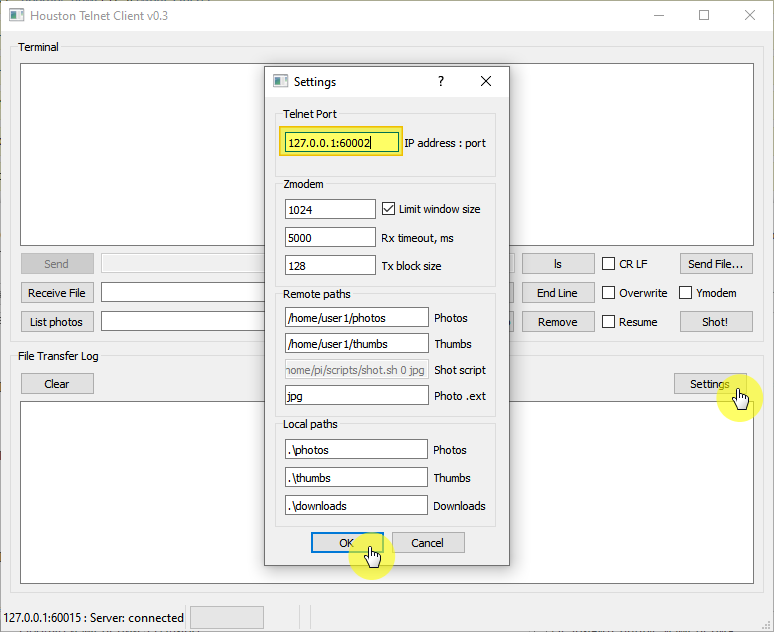
Picture 9. Houston Telnet Client Settings
Check the boxes CR LF and Ymodem and press the ls button to check the connection with VHF and the availability of downloaded files. The figure shows that there are 4 files in memory named 1.bin, 2.bin, 3.bin and 4.bin (Picture 10):
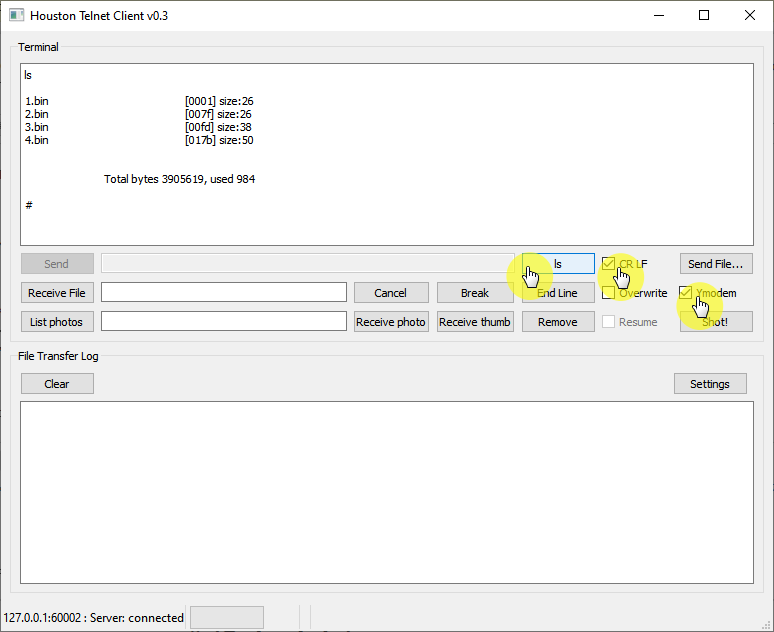
Picture 10. Checking the connection with VHF and the availability of downloaded files
Click the Send File... button, select the schedule file with the extension .bin from the folder C:\SX-Houston-app_v214.orbicraft.rc1\resources\schedule (Picture 11):
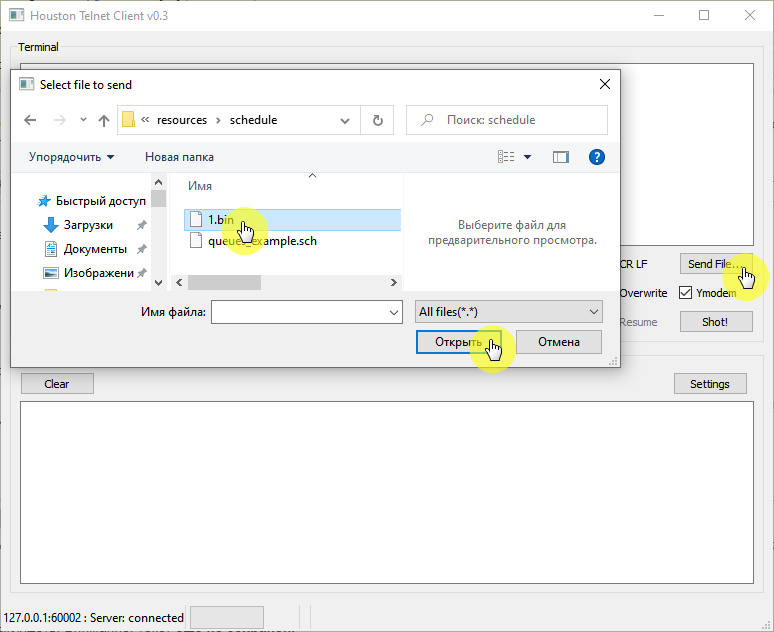
Picture 11. Selecting a schedule file
Wait for the file to download, the message File send ends (Picture 12) will appear in the log:
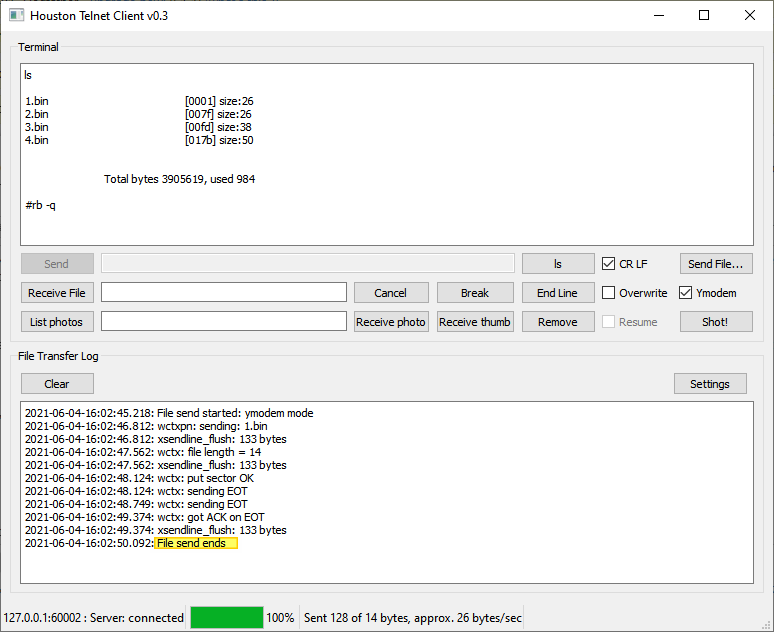
Picture 12. Uploading a file
You can verify the successful download of the file by clicking on the ls button;
In the Houston App issue the command 2-4230 tc_cmdshedule_load_from_file with the value value corresponding to the name of the file recorded on the VHF and wait for the response ~ASK and execution of commands from the schedule (Picture 13):
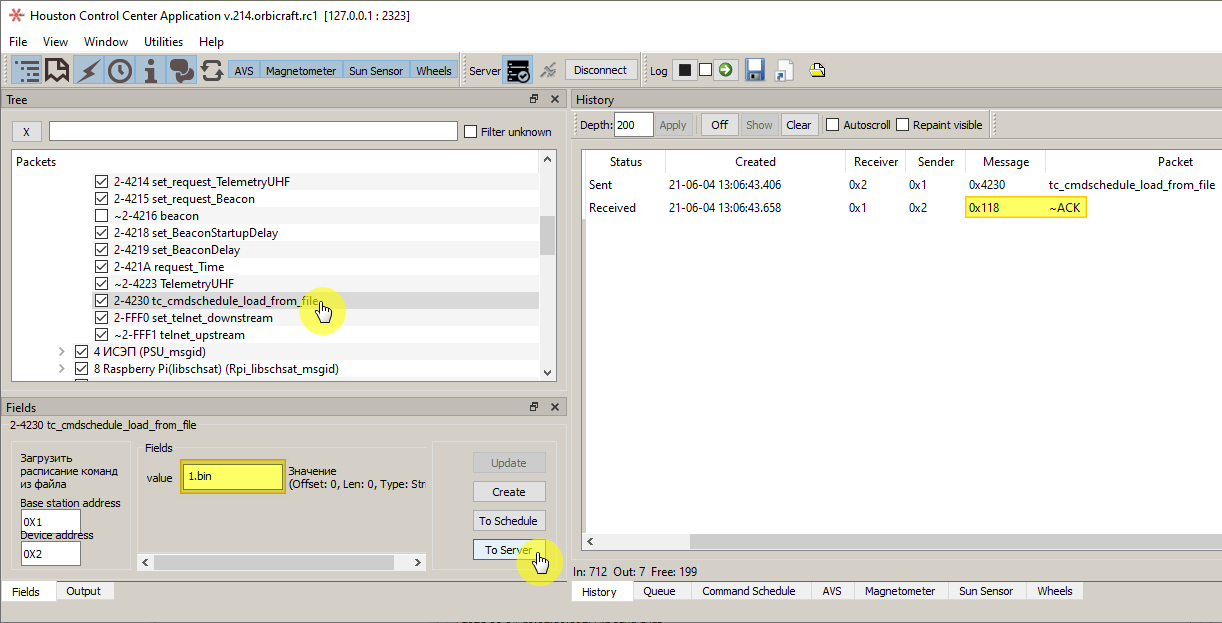
Picture 13. The response about the execution of commands