Lesson 9. Receiving CubeSat beacons (Sputnix devices)
To begin, configure the [SDR#] (/docs/vyunok/lessons/receive_radiosignals_rtl-sdr) and Orbitron programs.
Check that the time set on your computer is correct.
Configure the TLE source in Orbitron. Create a new Sputnix group and add TLE source (Picture 1):
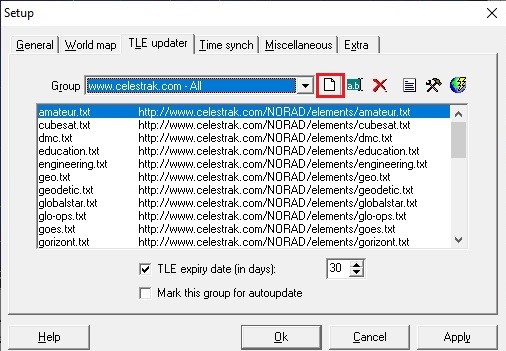
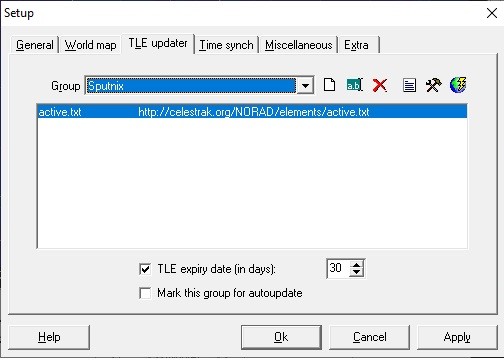
Picture 1. Creating a new group
Click on the TLE Download button and select active.txt to display satellites from the list (Picture 2):
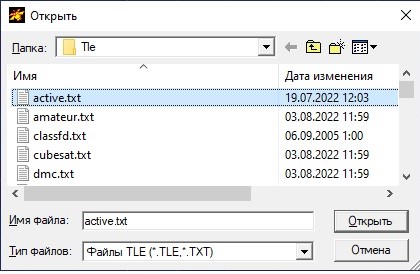
Picture 2. Loading TLE
Select the satellite to track from the list and start the calculation.
In SDR#, select the radio type WFM and set Bandwith according to the bitrate of the transmission. For example, if the bitrate is 2400, then bandwith is 3000 Hz, if 9600, then bandwith is 10000 Hz (Picture 3).
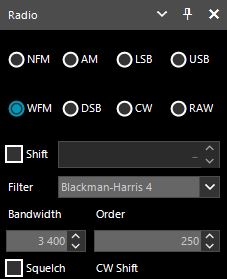
Picture 3. Settings in SDR#
If the bitrate is unknown, then focus on the width of the lighthouse on waterfall in the SDR# program.
Make sure that the correct device is selected and the gain is set correctly.
Check in the Audio tab that CABLE Input is selected in the Output section (Picture 4):
infoWe are talking about a virtual cable (VBCable driver). Read about how to install it in the section Installing the required software.
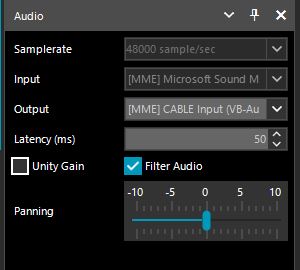
Picture 4. Checking the output device in the SDR program#
Make sure that the SDR data transfer driver button is pressed in the Orbitron program#
To decode the USP protocol developed by Sputnix, you need to download the program soundmodem from the link hs_soundmodem or [hs_soundmodem](http://uz7.ho.ua/gmskusp .zip "hs_soundmodem").
Run the hs_soundmodem program. Go to the Settings → Devices tab and check that the settings match Figure 5:

Picture 5. hs_soundmodem program settings
Set the first channel to 2400bd and the second channel to 9600bd.
Accepted packages will be displayed during the reception. To decode, install SPUTNIX Telemetry Viewer(Windows) for Windows or SPUTNIX Telemetry Viewer Linux for the Linux system. If configured correctly, you should have a connection and the Disconnect button (Picture 6) is active. If this did not happen, then check the connection settings in the Telemetry Viewer program as shown in Figure 7.

Picture 6. Disconnect button
Picture 7. Connection Settings
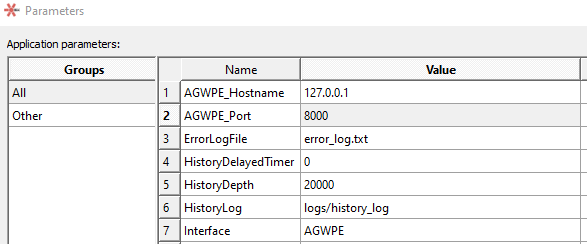
Previously, an increase in the volume of stored messages is required in the Telemetry Viewer. This is changed in the tab File → Parameters → HistoryDepth > =200000 followed by restarting the program (Picture 8):
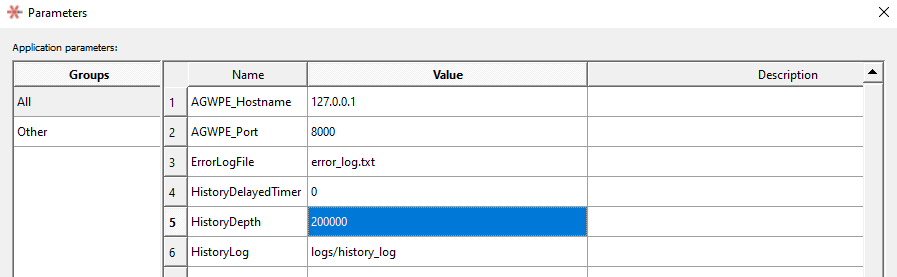
Picture 8. Changing the storage volume
When the soundmodem demodulates the signal, it sends the received packet to the Telemetry Viewer, which decrypts it. The History field displays all received packages. At the end of the reception, you can save the log file by clicking File → Save log as…
tipIf the Telemetry Viewer displays a message with a shift or distortion, try changing the font: View -> Font Settings, font Consolas.