Lesson 2. Tracking satellites with Orbitron
Orbitron allows you to get a schedule of satellite flights.

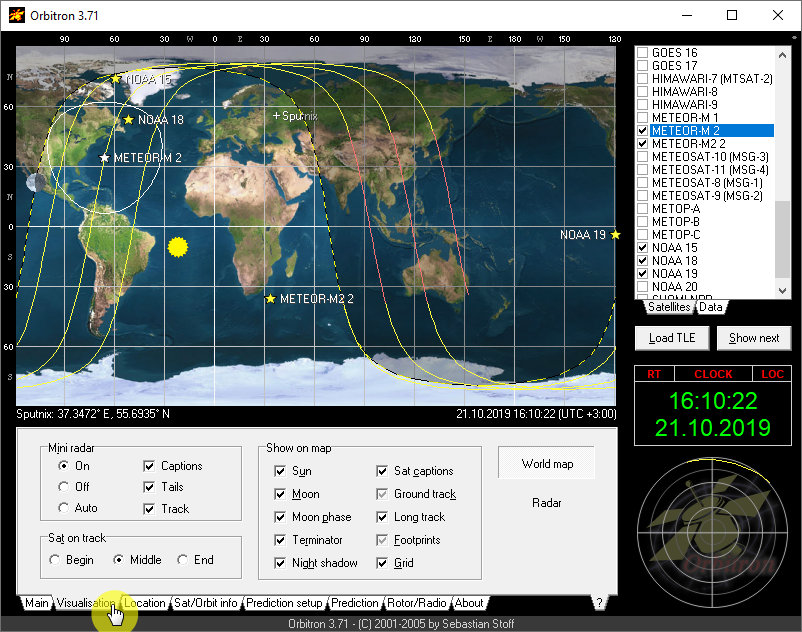
Picture 1. The main window of the Orbitron software
The main elements of the interface are:
- a list of spacecraft (right),
- an image of satellite and orbit location projections on the Earth Map (top),
- controls (bottom),
- an image of devices above the horizon (bottom right).
The clock and program status signals are also displayed on the right. On the "Main" tab in the control unit, you can select the time for which "now" is displayed on the display, that is, for the current time, and "simulation", that is, for any arbitrary time. The latter mode makes it very convenient to check how the satellite will move across the sky during the session. You can also choose between displaying local time and UTC (Coordinated Universal Time). It is very important that the program contains up-to-date data on the parameters of the orbits. It is advisable to update them at least once a week, and also before responsible sessions. For the program to work correctly, it is necessary that the time zone and the exact time are correctly set on the computer.
You can check the correctness of the time setting on the website TIME.JS
Setting up Orbitron
Launch the Orbitron program.
At the first launch, the program will offer to update information about the location of satellites from the Internet - TLE data. Click on the Yes button.
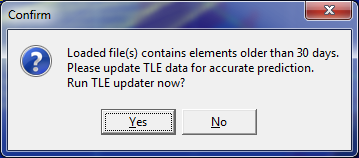
Picture 2. TLE update request
Press the button with the zipper.
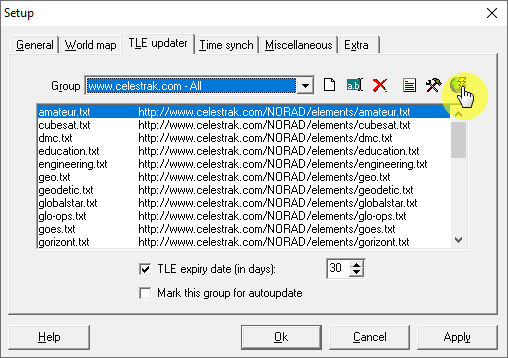
Picture 3. Orbitron Software Settings
Wait for the TLE update and click OK.

Picture 4. Confirmation of the TLE update
Now set the date and time format.

Picture 5. Choosing the date and time format
Close the settings window.
The first time you start the program, it runs in full-screen mode. Turn off this mode.

Picture 6. Disabling fullscreen mode
Select your current location.

Picture 7. Selecting the current location
The exact coordinates of your location can be determined on the map. Find your location on the map, right-click and select "What's here?».
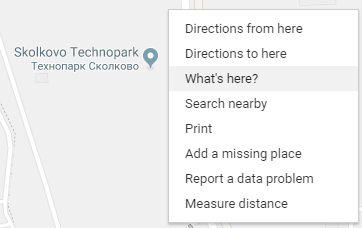
Picture 8. Choosing a place on the map
An information window opens with the coordinates of this location.

Picture 9. Information about the selected location
The first number is latitude, and the second is longitude.
Now you need to select the satellites that we will monitor. We need meteorological satellites that transmit open information in the band 137 MHz. Click the "Download TLE" button.
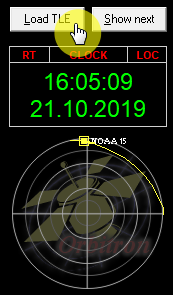
Picture 10. Loading TLE
Download the list weather.txt
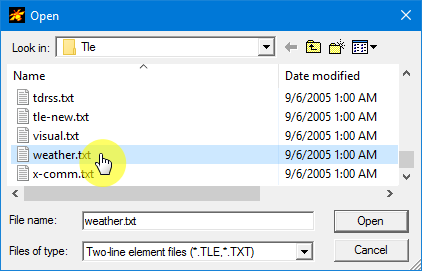
Picture 11. The list weather.txt
Only meteorological satellites will be displayed in the side list on the right. Select Meteor-M2, NOAA15, NOAA18, NOAA19.

Picture 12. Choosing satellites
The selected satellites will be displayed in the main program window.
Picture 13. The main window of the program
On the information tab, you can see detailed information about the selected satellite.

Picture 14. Information about the selected satellite
On the "Display" tab, you can configure the way information is displayed.
Picture 15. Configuring the way information is displayed
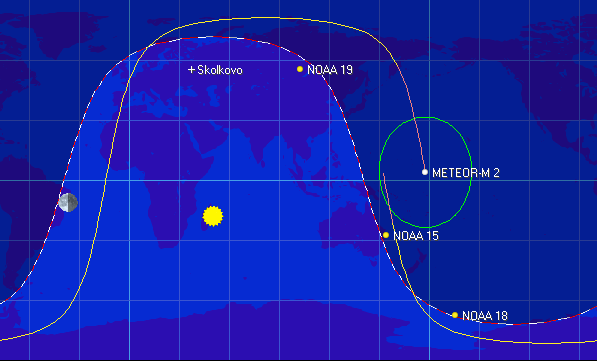
Terminator is a line separating day and night.
Satellite flight path - three turns (past, current and next).
Oval zones are the areas of visibility of satellites from the Earth's surface.
Now go to the "Calculation" tab - click on the corresponding button.

Picture 16. Carrying out the calculation
The program will calculate the time of appearance of the satellites when they rise above 10 degrees above the horizon.

Picture 17. Calculation results
The figure shows that the NOAA 19 satellite will appear at an altitude of 10 degrees above the horizon at 15:09, at 15:14 it will reach an altitude of 40 degrees, and at 15:19 it will leave the field of view.
Task
Analyze all communication sessions that Orbitron will show. Find "good" sessions when the satellite rises above 45 degrees above the horizon.
Connecting to SDR#
Now the most important thing is that you need to connect Orbitron to the SDR# program so that it automatically sets the desired reception frequency when a satellite appears. Go to the "Rotor / Radio" tab, select the SDRSharp driver and click the "Start Tracking" button.

Picture 18. Section "Rotor/Radio"
Record!
The following correct frequencies must be set in the receiving frequency window (Dnlink / MHz):
- Meteor M2 - 137.10 MHz;
- Meteor M2-2 - 137.10 MHz;
- NOAA 15 - 137.62 MHz;
- NOAA 18 - 137.91 MHz;
- NOAA 19 - 137.10 MHz.
Now, when the satellite appears in SDR#, information about it will appear, and the reception frequency will be set by Orbitron taking into account the Doppler effect.

Picture 19. Satellite Information

Picture 20. Signal modulation

Picture 21. Signal modulation
When the satellite Meteor-M2 appears, a special plugin Meteor Demodulator is activated.
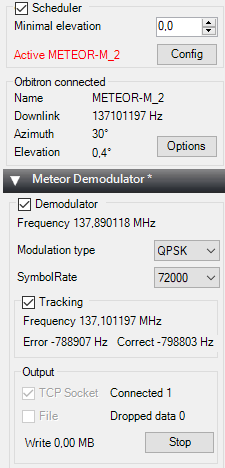
Picture 22. Meteor Demodulator
A special program will also be launched to process images from this satellite Meteor-M 2 LRPT Analyzer.
Picture 23. Meteor-M 2 LRPT Analyzer
The Doppler effect
The Doppler effect is a physical phenomenon consisting in a change in the frequency of waves depending on the motion of the source of these waves relative to the observer. As the source approaches, the frequency of the waves it emits increases and the length decreases. As the wave source moves away from the observer, their frequency decreases and the wavelength increases. For example, in the case of sound waves, when you remove the source, the pitch of the sound decreases, and when you approach, the tone of the sound becomes higher. Thus, by changing the pitch, you can determine whether a train or a car is approaching or moving away with a special sound signal.
![Diagram of the Doppler Effect]
Picture 24. The scheme of the Doppler Effect
The same thing happens with the satellite signal. When the satellite appears over the horizon and approaches us, the frequency of the received radio signal will change slightly and will not be exactly 137.1 MHz, but 0.003 MHz higher, and when the satellite moves away, it will be 0.003 MHz lower. The orbitron automatically takes this into account and sends the signal reception frequency adjusted for the Doppler effect to SDR# to improve the signal reception quality.