Lesson 7. Receiving AAUSAT-4 telemetry
The following software is used to receive telemetry from AAUSAT-4 satellites:
- SDR# for receiving a radio signal;
- Orbitron for tracking the satellite and taking into account the Doppler effect;
- Hs soundmodem for receiving command codes;
- Houston Application for decrypting telemetry command codes.
You can find all the necessary software on the page Installing the required software.
Launch SDR# and select the type of radio receiver: RTL-SDR connected via USB.
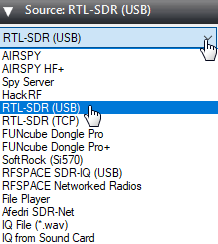
Picture 1. Choosing the type of radio receiver
In the Radio section, set the switch to WFM mode and set the bandwidth (Bandwidth) to 4000.
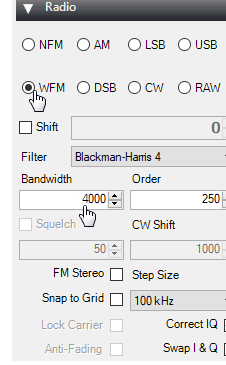
Picture 2. Switching to the WFM mode
Make sure that the "Filter Audio" checkbox is unchecked.

Picture 3. Audio Settings
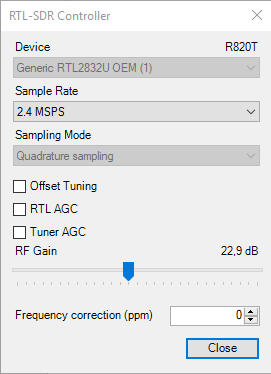
Next, it is necessary to increase the signal gain. To do this, click on the gear.

Picture 4. Signal settings
Move the slider so that the noise level increases by about 10 dB.
Picture 5. Increasing the signal gain
This is how the signal from the satellite AAUSAT-4 should look like.
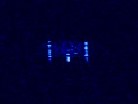
Picture 6. Lighthouse from kubsat
In the Tracking DDE Client section, if the Orbitron is connected correctly, information about the tracked satellite will appear.
![]()
Picture 7. Information about the tracked satellite
Launch Orbitron and update TLE first. Click on the button with the tools.

Picture 8. Launching settings
Click on the zipper button to update TLE.
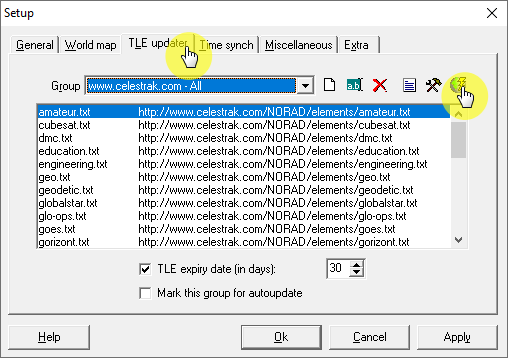
Picture 9. Orbitron Software Settings
Then select the file with information about weather satellites.

Picture 10. A file with information about weather satellites
Click on the "Download TLE" button.
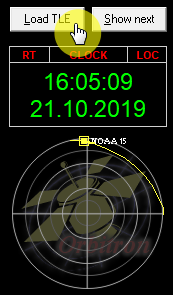
Picture 11. Loading TLE
Download the list cubesat.txt
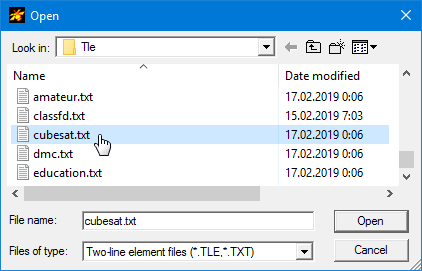
Picture 12. The list cubesat.txt
Only cubesats will appear in the side list on the right. Select AAUSAT-4.
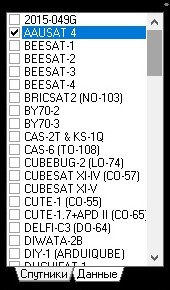
Picture 13. Choosing a satellite
The selected satellite will be displayed in the main program window.
Picture 14. The main window of the program
Then go to the "Calculation" tab and click on the "Calculation" button.

Picture 15. Carrying out the calculation
The time of the satellite's flight will be calculated automatically. Go to the "Rotor" tab/Radio" and make sure the tracking button is pressed.

Picture 16. Section "Rotor/Radio"
The following correct frequency must be set in the window with the receiving frequency (Dnlink/MHz):
- AAUSAT-4 - 437,424200 MHz
Run HS soundmodem

Picture 17. The main window of the program "HS soundmodem"
Open the settings section

Picture 18. Side Menu
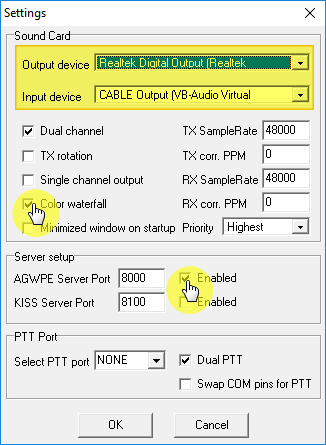
Select the audio source Input device – CABLE Output. Check the box AGWPE Server Port Enabled. Additionally, you can check the box Color waterfall (color waterfall).
Picture 19. The Settings window
To check the operation of HS soundmodem, turn on the recording of the signal from the satellite LitSat-1.
LitSat-1 satellite signal recording
Set the sound volume to maximum so that the waterfall is this color.

Picture 20. The color of the waterfall
After a while, satellite telemetry should appear in the HS soundmodem program window.
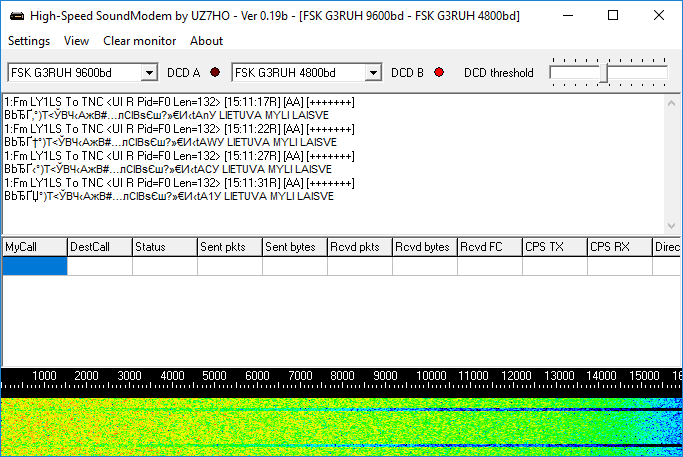
Picture 21. Satellite telemetry
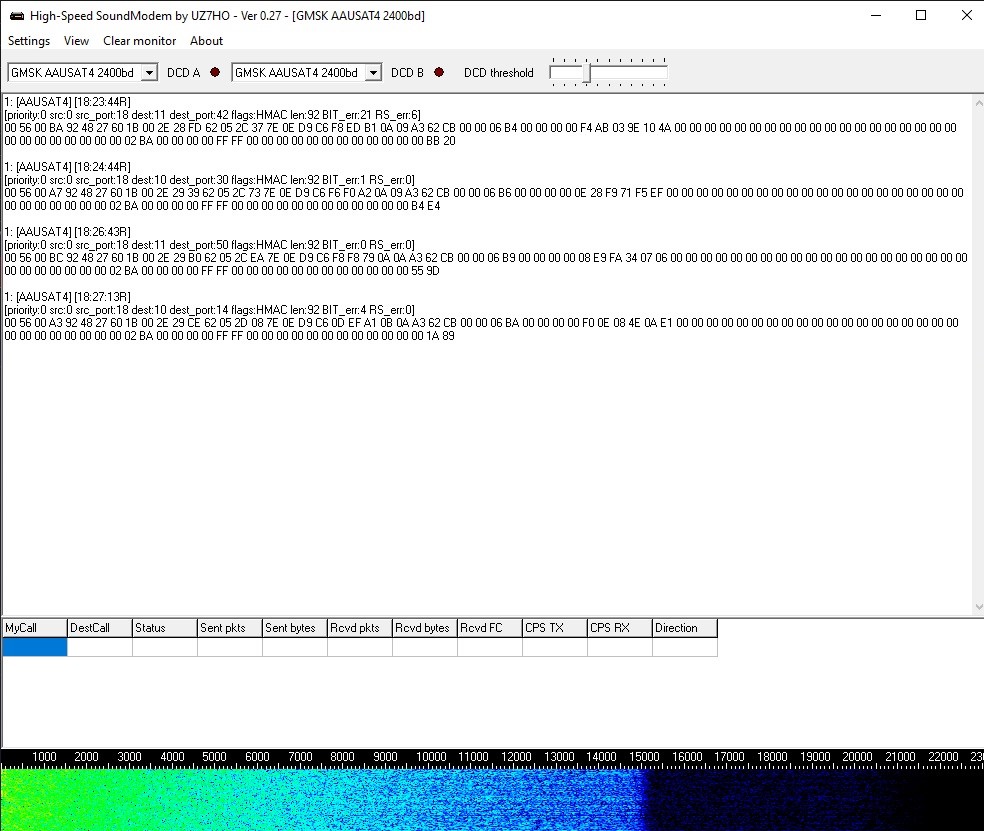
Now select the signal parameters GMSK AAUSAT-4 2400bd.
Picture 22. GMSK AAUSAT4 2400bd Signal Parameters
Now launch the Sputnix Telemetry Viewer.
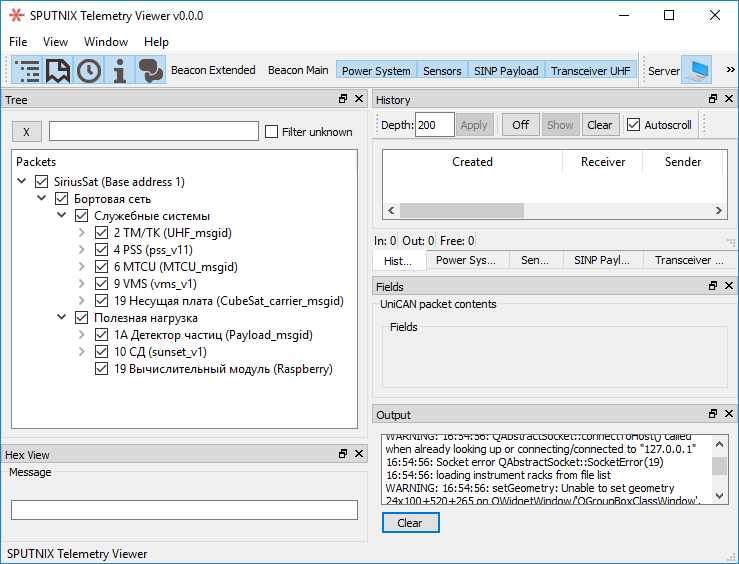
Picture 23. Main Menu of Sputnix Telemetry Viewer
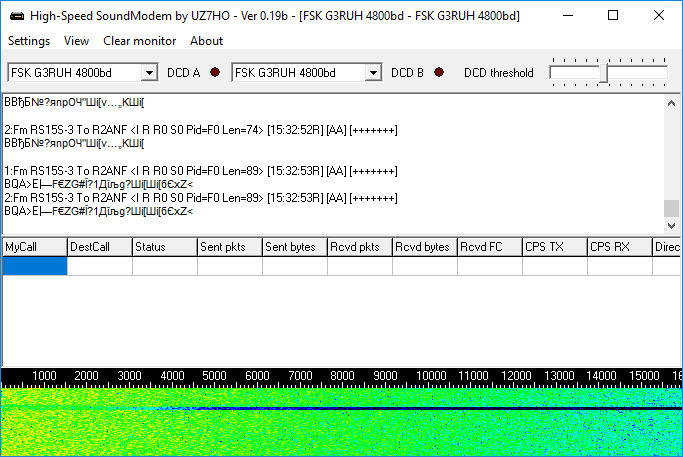
Test its operation by enabling the following signal recording:
Telemetry will appear in the HS soundmodem program.
Picture 24. Satellite telemetry
The telemetry decryption will appear in the Sputnix Telemetry Viewer program.
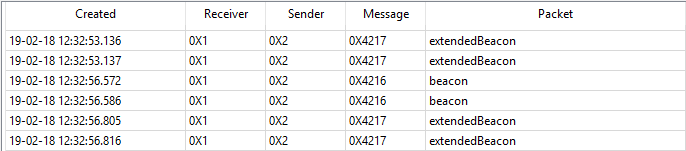
Picture 25. Decryption of telemetry
Click on any line and you will see detailed information received from the satellite.
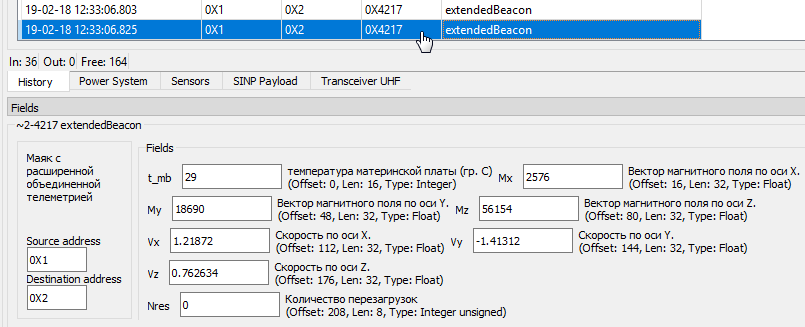
Picture 26. Detailed information from the satellite
The materials from the website [R4UAB] were used in the preparation of the lesson(https://r4uab.ru "R4UAB")