Lesson 10. Receiving a telegraphic code
The telegraphic code (or, more simply, transmission using Morse code) is still used by many small devices to transmit the beacon signal. A beacon is a periodically transmitted signal (most often once a minute or so), which contains the name of the spacecraft (call sign) and the most important telemetry – the voltage of the on–board power supply, the condition of batteries and solar panels, the temperature of various points of the device, and so on. By accepting these signals, the following tasks can be solved:
- Give the opportunity to receive the signal "by ear". Unlike digital signals, which can be heard by ear as hissing or buzzing, these signals have a well-recognized, "live" character. Even the simple fact of receiving the selected device usually makes a strong impression; since only the simplest means are used during reception, it is the reception of telegraphic signals that is primarily used when testing equipment and during the first attempts to use it;
- Demonstrate the Doppler effect. Due to the change in the relative speed of the device, the tone of the signal changes strongly enough during reception so that it can be heard even without musical hearing. This is one of the few available experiments where the Doppler effect is observed directly for electromagnetic waves.;
- Demonstrate the appearance of the device over the horizon, as well as the change in signal strength during its passage over the station; demonstrate the correspondence of the time of these phenomena to the time calculated on the basis of orbital data using special software.
The following software is used to receive the telegraphic code (also called CW - Continuous wave):
- SDR# for receiving a radio signal;
- Orbitron for tracking the satellite and taking into account the Doppler effect;
Launch SDR# and select the type of radio receiver: RTL-SDR connected via USB.
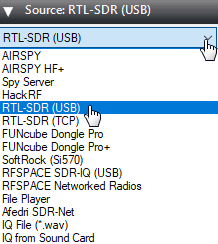
Picture 1. Selecting the type of radio receiver in the SDR#
In the Radio section, set the switch to USB mode and set the bandwidth to 5000.
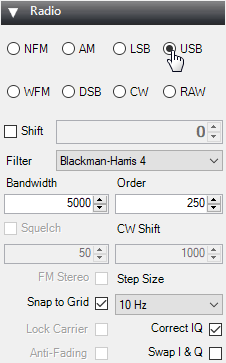
Picture 2. Radio Settings
Make sure that the "Filter Audio" checkbox is unchecked.

Picture 3. Audio Settings
Select the multimedia device connected to the computer in the Audio section:
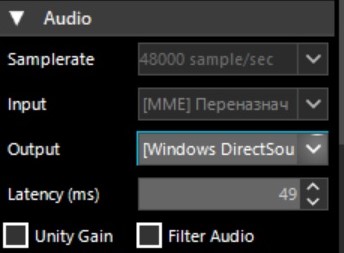
Picture 4. Selecting a multimedia device
Next, you need to increase the signal gain. To do this, click on the gear.

Picture 5. Signal settings
Move the slider so that the noise level increases by about 10dB.
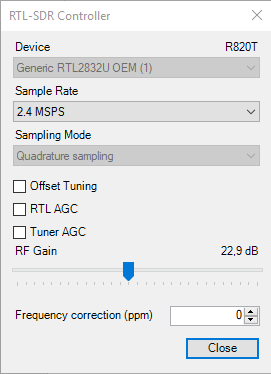
Picture 6. Changing the noise level
Launch Orbitron and update the TLE first. Click on the button with the tools.

Picture 7. Starting the settings
Click on the zipper button to update the TLE.
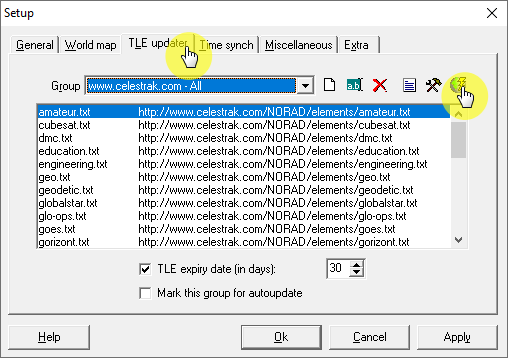
Picture 8. Orbitron Software Settings
Click on the Load TLE button.
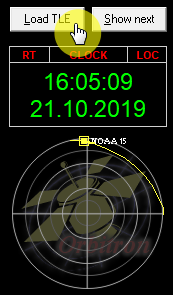
Picture 9. Loading TLE
Download the amateur list.txt
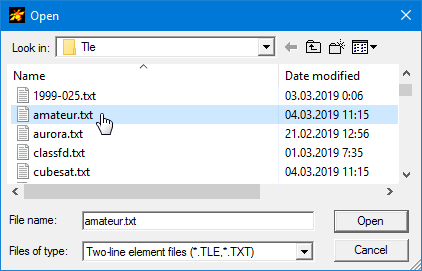
Picture 10. Loading the list
Only the satellites transmitting the telegraphic code will appear in the side list on the right. Select the following satellites.

Picture 11. Satellites transmitting the telegraphic code
The selected satellites will be displayed in the main program window.
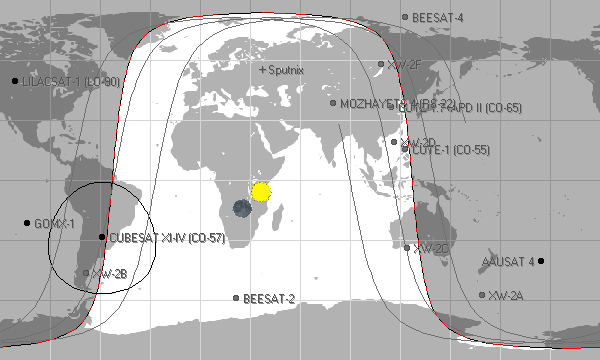
Picture 12. The main window of the program
Then go to the "Prediction" tab and click on the "Predict" button.

Picture 13. Calculation
An automatic calculation of the time of flight of the satellites will be performed. Go to the "Rotor" tab/Radio" and make sure the tracking button is pressed.
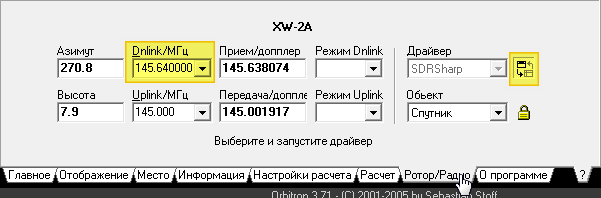
Picture 14. The "Rotor" tab/Radio"
In the window with the receiving frequency (Dnlink/MHz), the following correct frequency must be set, reduced by 3 kHz, so that the signal is located in the center of the band:
- CUBESAT XI-IV (CO-57) 436,8475
- CUTE-1 (CO-55) 436,8375
- CUTE-1.7 (CO-65) 437,275
- MOZHAYETS 4 (RS-22) 432.098
- XW-2A 145.640
- XW-2B 145.705
- XW-2C 145.770
- XW-2D 145.835
- XW-2F 145.955